Mastering Glass Can 3D Bee Quilling Art for Professional Results
The trend of transforming ordinary drinkware into stunning decorative pieces has taken the crafting world by storm, and at the forefront of this movement is Glass Can 3D Bee Quilling Art. This technique involves applying intricate, layered paper designs or high-resolution printed wraps to standard 16oz glass cans, creating an illusion of depth and texture that mimics traditional quilling without the hours of manual rolling. For creators, small business owners, and hobbyists alike, the appeal lies in the ability to produce unique, personalized items that stand out on social media and in home decor. However, achieving that flawless, professional finish requires more than just downloading a design and sticking it on glass. Many enthusiasts rush into projects without understanding the technical nuances of full-wrap applications, leading to wasted materials and frustrating results.
Understanding the Full Wrap Potential
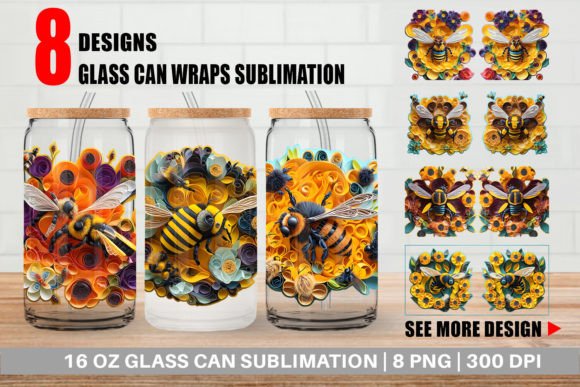
When you decide to create your own custom glass cans using a Full Wrap Design, you are essentially turning a blank canvas into a cohesive work of art. The specific design featuring 3D bee quilling art is particularly popular because it combines nature themes with a tactile aesthetic. To execute this correctly, you need high-quality source files. The ideal package includes 8 PNG files at 300dpi, sized precisely at 9.7 x 4.9 inches (or 2910 x 1470 pixels). These dimensions are not arbitrary; they are calculated to fit the curvature of a standard Libbey 16oz glass can perfectly. Using files with lower resolution or incorrect aspect ratios is the first major pitfall many beginners encounter. If the image is not 300dpi, the "3D" effect of the quilling will look pixelated when viewed up close, destroying the illusion of depth and making the final product look amateurish.
Common Mistakes in Material Selection and Preparation
One of the most frequent errors creators make is assuming that any printer paper will suffice for these wraps. While the digital file might be perfect, printing it on standard office paper leads to immediate failure. Standard paper is too thin, becomes translucent when wet with adhesive, and tears easily during application. For a true 3D bee quilling look, you must use a slightly heavier cardstock or a specialized vinyl sticker paper that can hold its shape and opacity. Furthermore, neglecting to clean the glass surface properly before application is a critical oversight. Even microscopic oils from fingerprints can prevent the wrap from adhering smoothly, causing bubbles or peeling edges within days. Always wash your Libbey glass cans with warm soapy water, rinse thoroughly, and wipe them down with rubbing alcohol to ensure a pristine bonding surface.
Another misunderstanding involves the cutting process. Many users print the 9.7x4.9 inch design and cut exactly to the edge of the image. This is a mistake. You should always leave a tiny margin or, depending on your adhesive method, cut slightly inside the line to prevent the white edge of the paper from showing if there is even a millimeter of misalignment. Conversely, if you are using a heat-shrink method, cutting too small will result in gaps. The key is to test one can before committing to a batch. This simple step saves money and prevents the disappointment of ruining multiple units due to a calibration error in your printer or cutter.
Application Techniques That Make or Break the Look
Applying a full wrap to a cylindrical object introduces challenges that flat framing does not. The curvature of the glass can distort images if the alignment is off. A common issue is the "spiraling" effect, where the pattern does not meet seamlessly at the seam, breaking the continuity of the bee quilling design. To avoid this, start your application at a distinct point in the pattern where a break is least noticeable, or use a guide tape to mark your starting line vertically. When smoothing out the wrap, work from the center outward to push air bubbles to the edges. Using a squeegee tool wrapped in a soft cloth is far superior to using your fingers, which can introduce new oils and uneven pressure.
Additionally, people often overlook the importance of sealing the edges. Even with high-quality adhesive, the top and bottom rims of the wrap are vulnerable to moisture and wear. Applying a clear, waterproof sealant or using a decoupage medium over the entire surface not only protects the 3D bee quilling art from scratches but also enhances the gloss, making the colors pop and reinforcing the three-dimensional effect. Without this protective layer, the artwork may degrade quickly, especially if the glass cans are washed frequently or used for cold beverages that cause condensation.
Evaluating Quality Before You Begin
Before you download or purchase a design pack, verify the file specifications. Ensure the provider offers the 2910 x 1470px resolution specifically mentioned for these projects. Some sellers offer generic "can wraps" that are stretched or compressed, which distorts the delicate lines of quilling art. Look for previews that show the design mapped onto a cylinder to gauge how the pattern flows. If the bees or floral elements look squashed near the edges in the preview, the file is likely not optimized for the 9.7x4.9 inch format. High-quality files will maintain consistent proportions across the entire width.
It is also wise to consider the color profile of your printer. Designs meant for screen viewing (RGB) often look duller when printed (CMYK). If your prints look washed out, adjust your printer settings to "vivid" or "photo" mode and ensure you are using the correct paper profile in your print driver. This attention to color accuracy ensures that the yellows of the bees and the greens of the foliage remain vibrant, preserving the intended artistic impact of the 3D quilling style.
Moving Forward with Confidence
Creating custom glass cans with 3D bee quilling art is a rewarding endeavor that blends digital precision with hands-on crafting. By respecting the technical requirements of the full wrap design—specifically the 300dpi resolution and exact dimensions—you set a strong foundation for success. Avoiding the traps of poor material choices, inadequate surface preparation, and hasty application will elevate your work from a DIY experiment to a professional-grade product. Whether you are making gifts, selling at local markets, or simply decorating your home, taking the time to do it right ensures that every glass can reflects the beauty and detail of the original design. Remember, the difference between a good result and a great one often lies in the small details you check before you even make the first cut.